0. 前言
在正式進入到資料圖表之前,我們先來設置電子郵件,除了填補上期邀請用戶的缺口外,未來設定數據警報的接收信箱也算較為簡單的方式。
其設定的修改略微繁瑣,希望各位還能跟上步伐並保持熱忱!
1. 重點
2. 內容
2.1. 檢查設定
左側選單中找到 Adminstration >> General >> Settings 並 Ctrl + F 搜尋 smtp,此時可以看到預設情況沒有啟用且使用本地的信箱地址,若沒有經過完善的設定是沒法發信給別人的,後續我們就以 Gmail 來做替換。
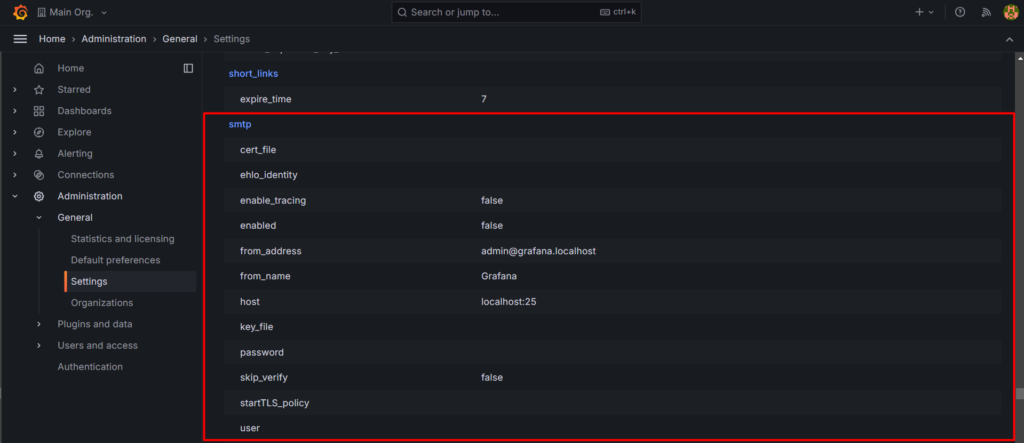
沒有細查原因但 Grafana 即使有 Grafana Admin 最高權限也沒有辦法利用網頁介面進行修改,回到頂部也可看到提示請我們去調整 .ini 檔並重新啟動。

2.2. 調整設定
我們開啟 Terminal 輸入以下指令進入到容器並使用 root 權限,因為我們後續需要安裝檔案編輯相關套件。
docker exec -u root -it grafana /bin/bash接著移動到該設定檔的位置,檢查是否有前述的檔案存在。
cd /etc/grafana/
ls

找到檔案之後我們就要開始進行修改,我們首先要先安裝文字編輯器,這邊我個人習慣是用 nano。
apt-get update
apt-get install nano -y
接著輸入以下指令進入檔案,接著按下 Ctrl + W 並搜尋 smtp,接著敲下 Enter 應該就會到該區塊之設定。
nano ./grafana.ini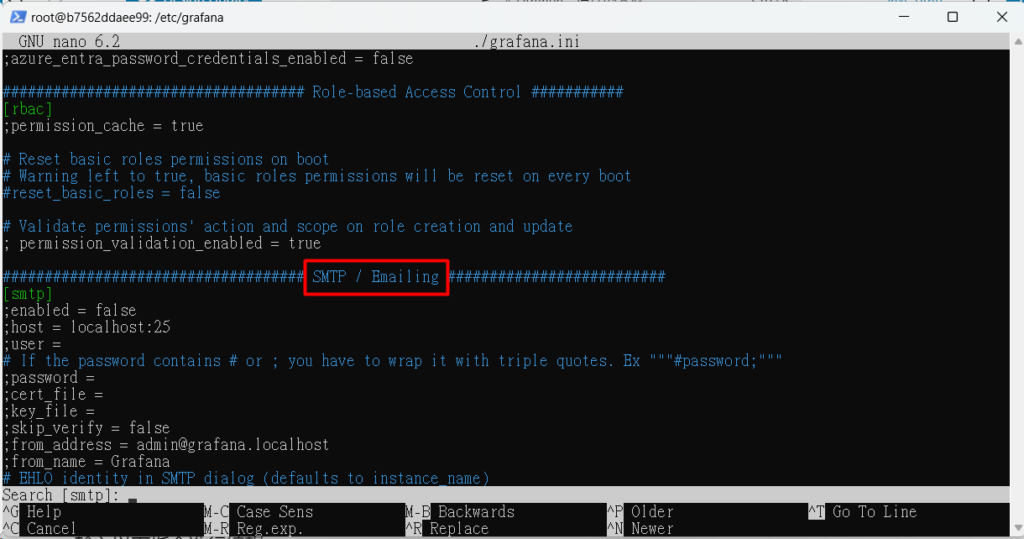
我們修改以下幾個項目,過程記得刪除開頭的 ; 符號,那關於 SSL 與 TLS 安全協議的部分這邊從簡就先略過。確認完成後我們就透過 Ctrl + X >> Y >> Enter 儲存並重新啟動容器。
[smtp]
# 啟用信箱功能
enabled = true
# SMTP 伺服端口
host = smtp.gmail.com:587
# SMTP 所屬用戶
user = ${YOUR_OWN_EMAIL}
# If the password contains # or ; you have to wrap it with triple quotes. Ex """#password;"""
# 應用程式金鑰
password = ${YOUR_APP_PASSWORD}
# 略過憑證檢查 (SSL/TLS)
skip_verify = true
# 信件顯示信箱
from_address = admin@grafana.localhost
# 信件顯示名稱
from_name = Grafana
這邊我會建議使用其他信箱作為來源寄送到常用信箱,若使用與 user 相同的信箱在總攬會看到 me 的字樣。

2.3. 測試設定
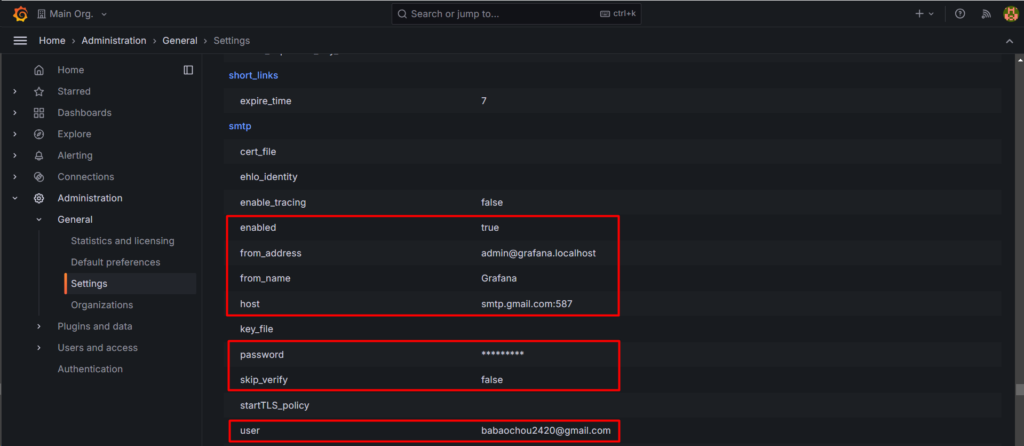
首先重複步驟 2.1 透過 Grafana 的介面確認設定是否成功套用。
關於測試的部分不用等到未來綁定數據警報,記得上次我們談到組織用戶的邀請嗎?這次勾選寄送邀請信件並確定使用 eMail 進行登入帳戶。
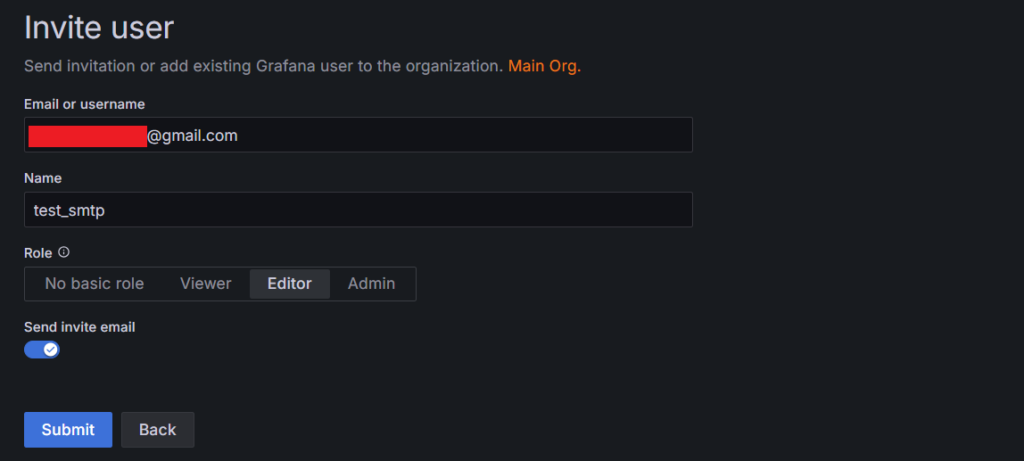
接著就到信箱看看是否收到信件,話說不太清楚是 Gmail 有改過設定還是 Grafana 的問題,雖然顯示 from_name 的假名但信箱地址沒有更換。


3. 後話
透過 SMTP 的設定除了警報提醒外,在邀請用戶的邀請上也不用手動傳輸網址,觀感上也更有格調。畢竟屬於系統設定,就決定先提前作示範。
下回我們就來嘗試新增簡單的資料來源並製作儀表板吧!
4. 參考
[1] Configure eMail for Alerting — Official
https://grafana.com/docs/grafana/latest/alerting/configure-notifications/manage-contact-points/integrations/configure-email/